
The next step for you to start using the gert.io product is to connect it to your Zendesk. This article covers the following subjects:
Important information about connecting
An important thing to evaluate before starting to set up your query configurations is to decide if you want to test the functionality of gert.io on you Zendesk Sandbox prior to activating it on your live Zendesk Instance.
Whether you're connecting to your Sandbox or your live instance the following steps are the same - the only different thing is the URL you're connecting to.
When starting the below steps, please ensure you're logged into the instance of Zendesk you're connecting gert to.
Connecting gert.io to Zendesk
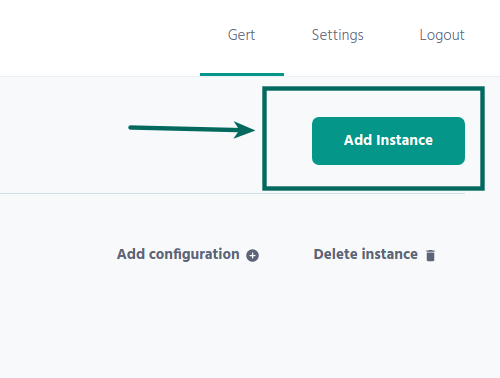
When logging into gert.io you're routed to the "Instances" overview. To access this part of the platform wherever you might have navigated to, simply click the "Gert" menu item in the top right navigation menu.
When on this page, click the "Add instance" button to the right, below the navigation.
When clicking this button a pop-up will appear, asking you to enter the subdomain of your Zendesk instance - this is where you need to add either the subdomain of your sandbox or your live instance.
The subdomain of your Zendesk instance is the part before ".zendesk.com". In the Zendesk domain "helphouse.zendesk.com", I will in the popup simply add "helphouse".
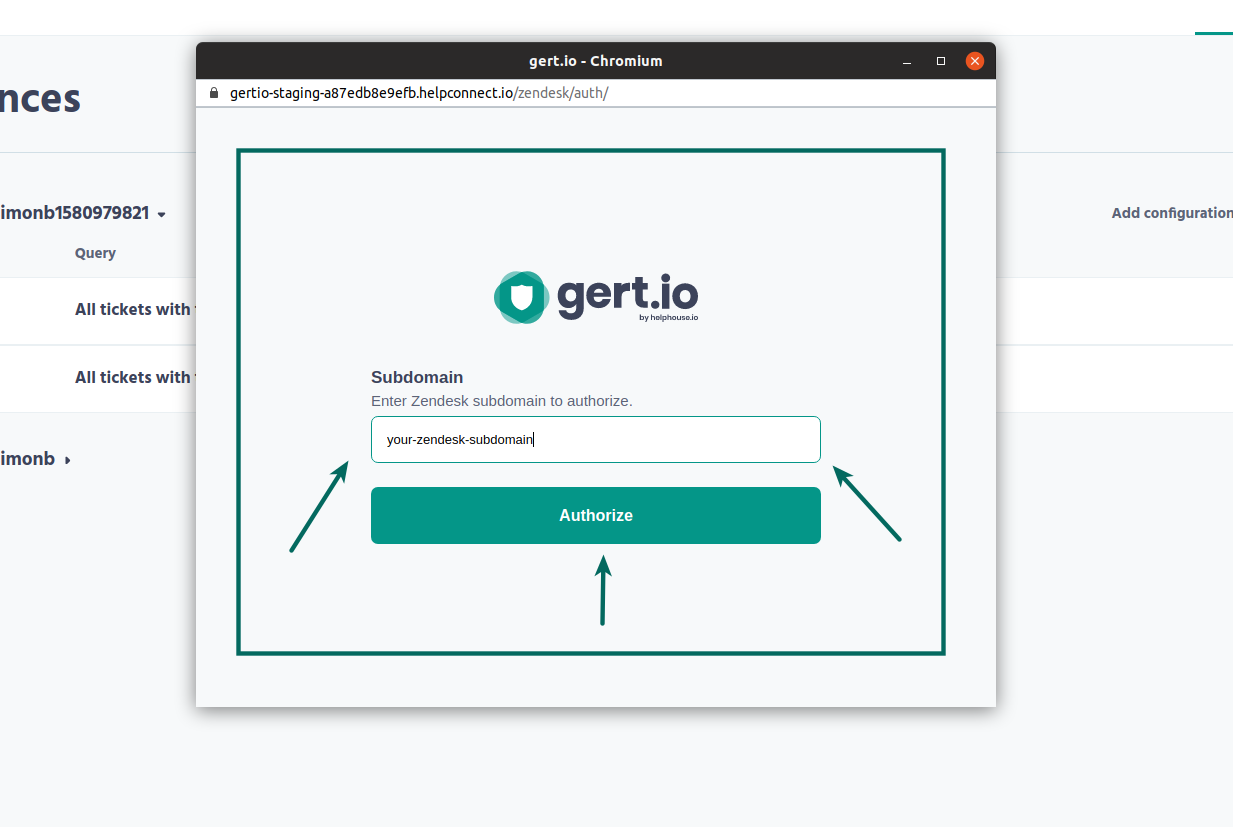
A permission screen will now appear, where you need to allow gert.io into your Zendesk instance. Once allowed, you will be able to see your Zendesk instance on the list in the gert.io platform.
Next steps
The next step for you is to start building your queries so that gert.io can delete or redact tickets in your Zendesk, and thereby make your Zendesk compliant! Read this article to get started and see how it's done.
Comments
0 comments
Please sign in to leave a comment.